Our On Location series reveals where some of the best-loved art materials are made, and gives insight into art materials manufacturers’ working methods. On this occasion, we travelled to Skipton, North Yorkshire in the UK to visit the Pro Arte factory, where skilled brushmakers work to produce a wide range of artists’ brushes, from their classic Prolene range for watercolour to their versatile Sterling brushes for acrylic and oil.

The Pro Arte factory in Skipton, North Yorkshire.
On Location at Pro Arte
Located on the edge of the rugged Yorkshire Dales in the historic market town of Skipton, Pro Arte was established in 1973 by artist Roy Thompson. Initially working from a garage in Leeds, the company’s growing reputation for fine quality brushes, along with advances in innovative synthetic alternatives, led to their expansion and relocation to an old mill in the heart of Skipton. Today, Pro Arte is run by Roy’s son Peter and his grandson Johnny, who continue to build on Roy’s achievements in producing superior handcrafted brushes that combine tradition with modern manufacturing techniques.

Entering the Pro Arte factory.

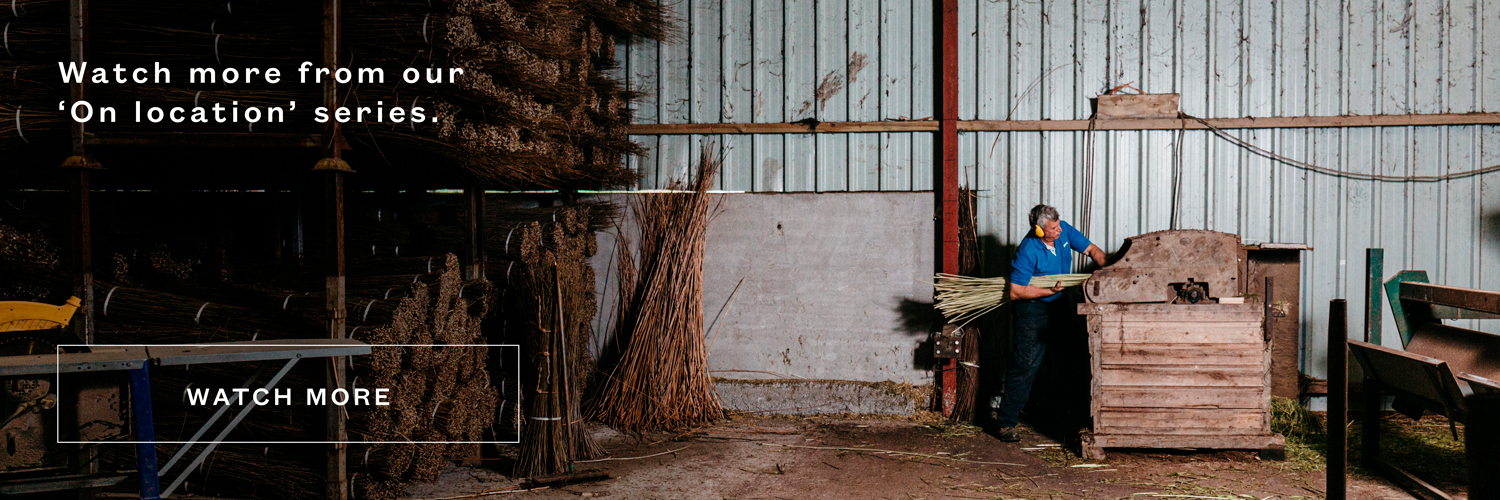
Side rooms and equipment at Pro Arte.
From Wool Spinning Mill to Brush Factory
In the 19th century, Skipton emerged as an important mill town, and the Pro Arte factory is housed in what used to be a wool spinning mill, an impressive building built from solid Yorkshire sandstone. As you enter the double-height ground floor, you’re greeted by shelves stacked with raw materials – boxes of bundled brush hair, ferrules, handles, and brush caps – alongside finished products ready for dispatch. From here you make your way up to the two floors where brushes are expertly made, innovation is planned, and business is done.

The brushmaking area.
Being a family-run business, the atmosphere is warm as well as industrious, with a close-knit feeling among all the staff. Each expansive floor has open areas and side rooms where different parts of the brushmaking process are completed. Workbenches dotted with arc lamps are a hive of activity as expert brushmakers carry out their meticulous work. To one side, on the first floor, are the offices and a reception area showcasing brush stands through the ages, old advertising posters, and other curiosities from the company’s history.

Workbenches where the brush hair is prepared.
The Seven Stages of Making a Pro Arte Brush
Hair Preparation
Pro Arte have applied a lot of research into the types of brush hair they use, whether it be the finest synthetics such as Taklon and Toray, or traditional natural hair like sable, squirrel, and hog bristle. The hairs are sourced internationally and arrive in pre-cut bundles which may need further trimming before assembling the brush heads.

Monitoring the brush hair as it runs through the ‘pasta machine’.
In the case of synthetic hair, different grades of hair are often mixed to achieve the perfect tension and responsiveness. For example, Taklon is much stiffer than soft Toray filaments, but when combined the brush performance is enhanced. In the depths of the factory, a special room away from the elements (dry air can make hairs difficult to handle) houses a hair-mixing machine nicknamed the ‘pasta machine’. This strange-looking contraption has a conveyor belt where the hairs are carefully blended. Two operators monitor it, keeping the hairs even and preventing lumps or clumps from forming.

The ‘pasta machine’.
Upstairs another machine can ‘speed-pick’ bundles of 50 mm or 70 mm synthetic hairs. In an exacting process, standard-size bundles are placed in the machine which is set to the micrometre before cutting with a guillotine. The length is set to slightly overcompensate so that the ‘length out’ can be later worked firmly into the ferrule.

Brush hair being prepared for trimming.
Brush Head Making
Shaping and inserting brush hairs into ferrules is done by hand and is known as ‘picking’. The picker must gather the correct amount of hair from the pre-cut bundles which is then shaped using a brush cannon before being inserted into the ferrule. A brush cannon is a brass cone-like device that acts like a mould to help shape the hair ensuring the filaments are evenly distributed. The ferrules are then placed into a Cannon Shaker, a small vibrating tray that firms up the distribution of hair.

Shaping the brush hair.

Inserting brush hair into a cannon and hair bundles.

Preparing and measuring the brush hair.
In the case of natural hair, hand-tied cotton thread is used. This gives the picker purchase due to its uneven quality – unlike synthetic filaments natural hair tends to be thicker at one end making it harder to control and shape.

Weighing the brush hair.
For a brush made with combined natural and synthetic hair, such as the Connoisseur, the correct mix is established by weight, using scales. The two amounts are then mixed by hand with a flipping and tapping technique aided by a comb and ruler. After this, the Cannon Shaker does its work as before.

Cannons, the Cannon Shaker, and preparing the epoxy resin.
All brush heads are manually checked for their belly, shape, and point and hand-trimmed when necessary. It is a testament to the highly skilled artisans at Pro Arte that the brush heads are made this way, whether crafting a flat, round, filbert, or sword-shaped brush.

Applying the glue to the ferrules.
Glueing the Hairs Into the Ferrule
Next, a special epoxy resin is prepared using a static mixing machine. The machine can be set to make the correct amount of glue for the brush head batches required. The resin is then injected into the upturned ferrules via a compressor-controlled syringe, adjusted to give the correct dose depending on the size, shape, and type of ferrule. Ferrules differ between nickel-plated brass, gold-plated brass, or polished aluminium.

Handles being prepared for printing.
Handle Printing
Before the brush handles can be fixed to the brush heads, the handles must be printed with the Pro Arte logo and relevant brush information such as the product name and size. This is done using an open or closed pot system depending on the handle length. Short handles are printed using the closed system whereby the ink is printed via closed etched plates. Long handles are also printed using etched print plates but the machine used is an open pot system which can be quite messy.

The handle printing room.
The handles are carefully sourced for their straight-grained wood and are FSC-certified. They arrive at the factory pre-cut to the company’s specifications including being triple-dipped in water-based lacquer. Handle shapes vary from classic handle designs to the exceptional tri-grip handle used for their Miniature series.

Handles ready for their brush heads.
Heads to Handles
The brush heads are fixed to their handles using one of two methods. For smaller brushes, the handle’s tips are dipped with PVA glue and then suspended vertically, with the brush head pointing upwards, which lets the glue settle while filling any gaps inside the ferrule.

Hair being fitted to the ferrules.

Ferrules being clenched.
For large brushes, a hot glue gun is used. The glue is applied around the inner edge of the ferrule and the handle is inserted and twisted around quickly so that the printed copy is in line with the flat part of the brush.

A selection of ‘bits’ for clenching round brushes.
Clenching the Heads
Clenching the ferrule is partly aesthetic but also strengthens the brush. Clenching is done using a clamp-like device that crimps the ferrule leaving ringed indents. The clenching device is adjusted to the correct size using removable metal plates organised on a board close by.

Brushes being clenched.
Finishing Process
At last, the brushes are almost ready for packaging and their journey out into the world. Before that, some final touches are applied. The brush heads are dipped in a hot water vat and placed in a mould that gently oscillates giving them as much uniform shape as possible. The brush heads are then dipped in gum arabic to preserve their shape and trimmed of any burrs or wonks with a fine razor.

Will Rochfort brushes ready to be packed.
Brush Cleaning Advice From a Pro Arte Pro
Peter and Johnny were highly passionate about their artists’ brush company as they showed us around the Pro Arte workshops. Peter was particularly proud of how they were constantly looking at ways to keep innovating and offer new brushes that artists were looking for, such as their high-performance synthetic Sablesque range. He also pointed out that their flagship Prolene brushes had been regularly modified over the years to keep pace with breakthroughs in synthetic technology.

A selection of Pro Arte artists’ brushes.
Before we departed he gave some sage advice when cleaning your brushes – gently knead the hair to loosen residue pigments, particularly around the ferrule, and shape them as close to their original form as possible before storing them away.
Further Reading
Artist Review: Da Vinci Professional Brush Soap
Understanding Brush Shape Names, Hair, and Applications
Shop Pro Arte Brushes on jacksonsart.com